Prepare the tenant's ID document — identity card, passport or residence permit — as a photo or scan (front and back), or keep it at hand to take pictures with your phone. Also note the guarantor's details, if any.
Open the tenant wizard
Open your rental, then Units, and click the unit name.
In the current rental type block, click Add a tenant.
The unit page shows the rent, the occupancy, the current tenants and the history. Click Add a tenant to open the wizard.
The unit is already occupied?
You can still add a tenant to prepare the next lease. A red message shows the date from which the new lease can start: the day after the current lease ends (for several identical units, the first date one of them becomes free). The wizard prefills this date and refuses any earlier date. For a flatshare, the date depends on the unit chosen.
Step 1: upload or photograph the ID document
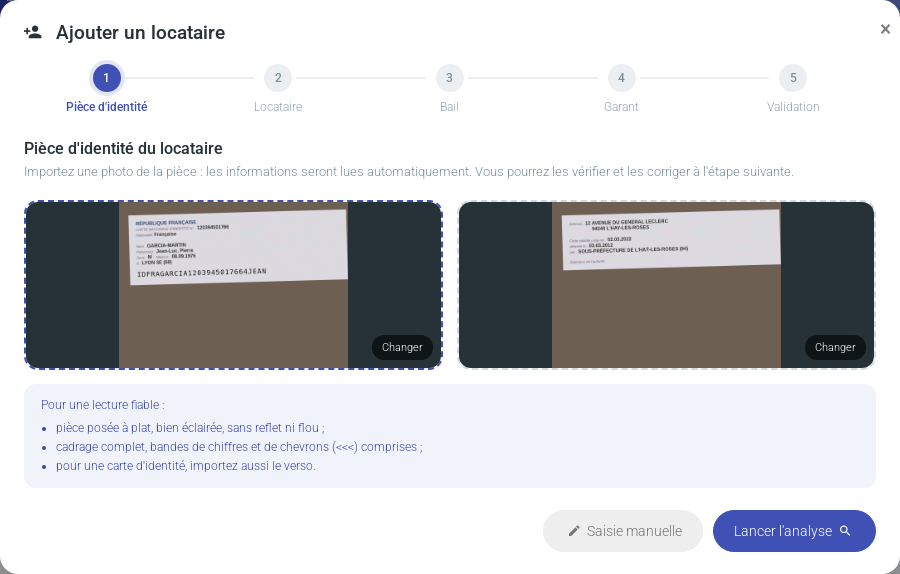
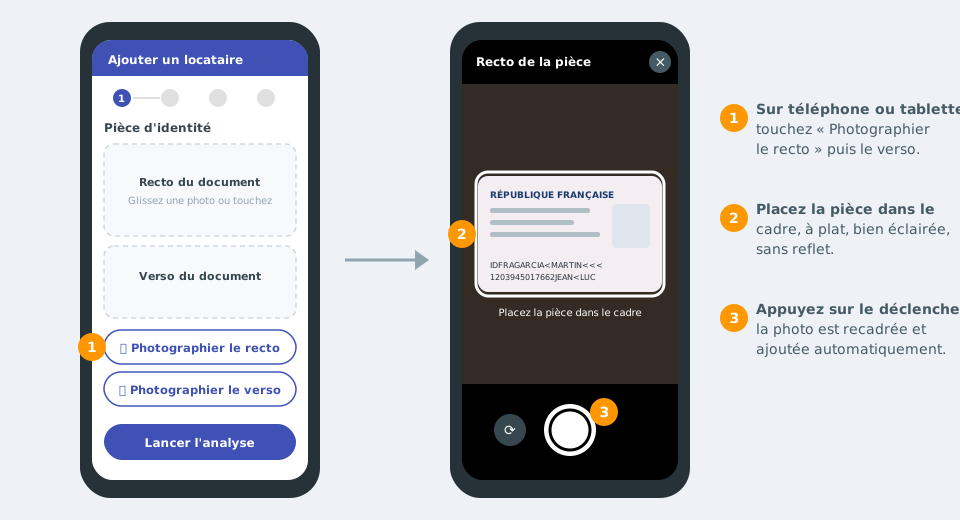
Drop the front and back photos (or click the areas to choose them): a preview is shown. Then click Start the analysis. You can also go straight to Manual entry.Step 1: both sides are uploaded, the analysis can start.On a phone or tablet, two extra buttons, Photograph the front and Photograph the back, open the rear camera with a card-shaped frame. Place the document in the frame and press the shutter: the picture is cropped and added automatically. If your browser does not allow the live preview, the phone's camera app opens instead.On mobile: photograph each side inside the frame, the picture is added to the wizard.
For a reliable reading
Document flat, well lit, without glare or blur; fully framed, including the rows of digits and chevrons (<<<). Always upload the back: on many cards the dates and the address are printed there.
What the analysis reads
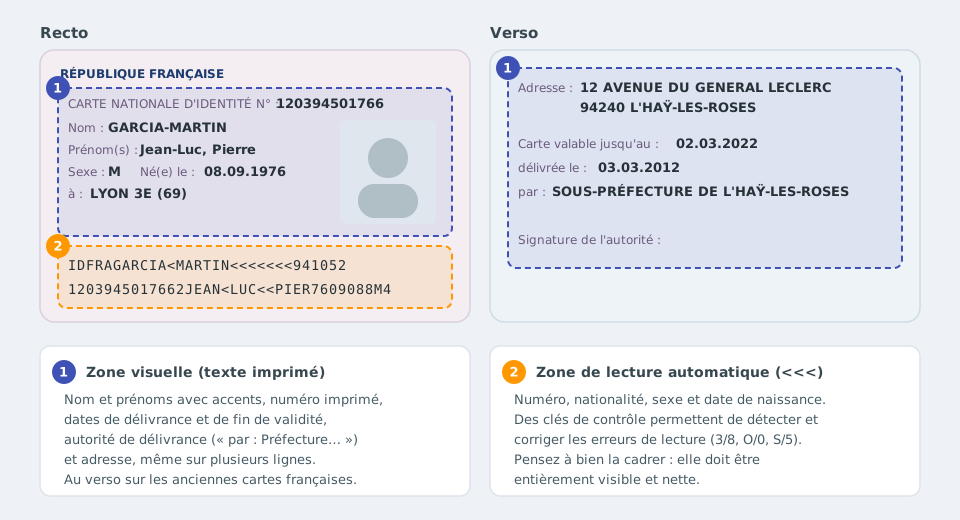
The analysis runs in your browser (the pictures are only sent when the tenant is saved) and takes a few seconds; a progress bar shows its progress. It uses two areas of the document:
the visual area: surname and given names (with accents), number, issue and expiry dates, issuing authority and address, even over several lines;
the machine-readable zone, the rows of letters, digits and chevrons (<<<): number, nationality, sex, dates. Its check digits correct common reading errors (3/8, O/0, S/5).
Supported documents: card-format identity cards and residence permits, passports, and old French identity cards (1995-2021).The two areas read: printed text (1) and machine-readable zone (2).
Step 2: check the details
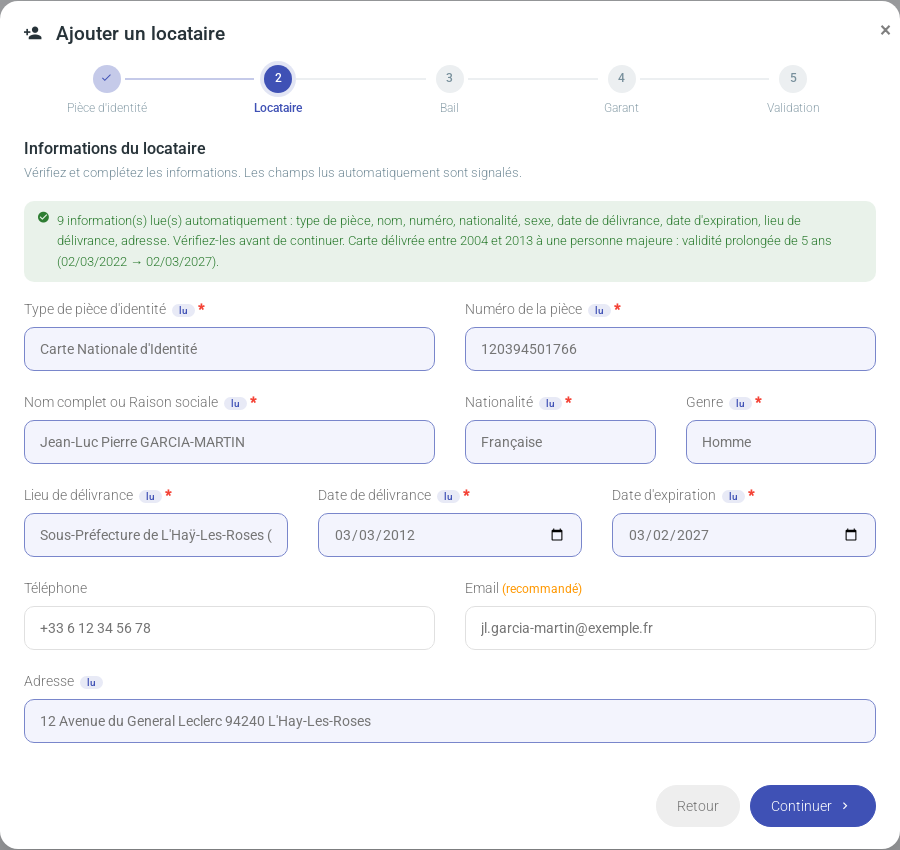
The form is prefilled. A banner lists the details read and each field filled automatically is tagged lu (read). Check them — especially the name and the number — and add the tenant's phone and email, which are not on the document. As soon as you edit a field, the tag disappears.Step 2: 9 details read from an old French card, to be checked.If a required field is empty or invalid, a message in the window tells you which one to fix.
Special cases: old French identity cards
Upload the back: the issue date, the expiry date, the authority (« par : Préfecture de… ») and the address are printed there. If only the front is uploaded, the wizard reminds you.
5-year extension: a card issued between 2004 and 2013 to an adult remains valid 5 years after the printed date. The wizard applies this extension automatically and says so.
Expired document: the date is still filled in, the field is flagged in red and a warning asks you to request a valid document.
Card issued in 2010: extension applied, then flagged as expired.
Steps 3 and 4: lease and guarantor
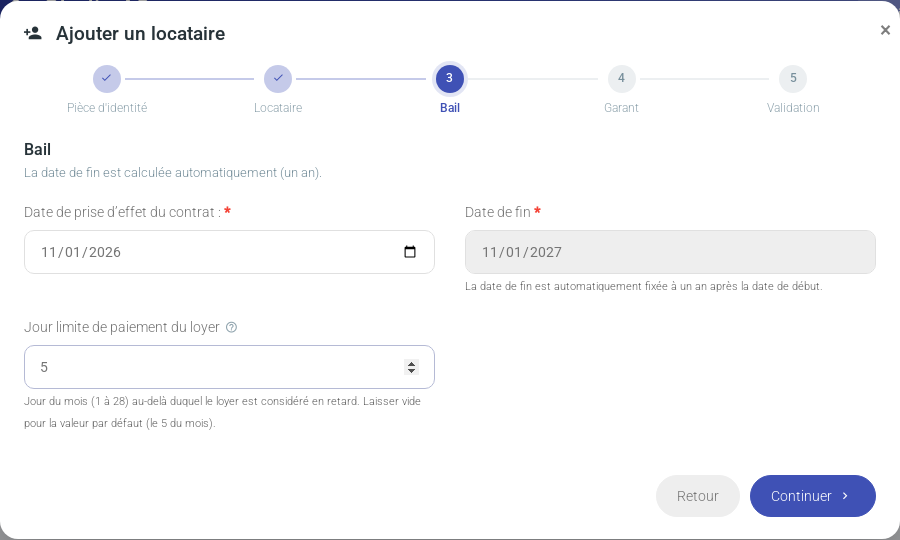
Step 3 — Lease: enter the start date; the end date is set automatically one year later. You can also set the rent payment due day.
For a flatshare, first choose the tenant's flatshare unit. Each one is listed with its status: “free”, or “occupied, start possible from …”. For an occupied unit, the start date is set automatically to the day after the current lease ends. A unit already booked for the next lease is no longer offered.
Step 4 — Guarantor: if the tenant has a guarantor, enter their type, title, name, ID document, phone, email and address; otherwise untick the box.Step 3: the end date is calculated automatically.
Step 5: confirmation and saving
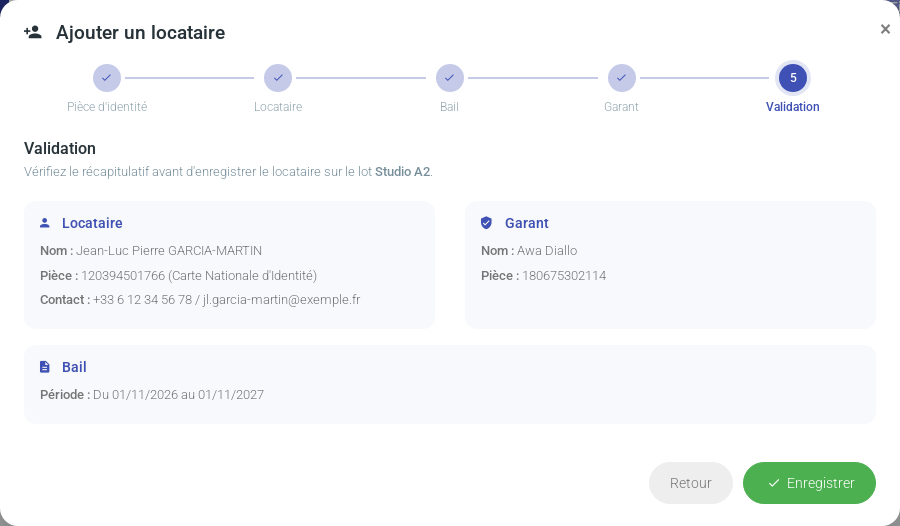
Review the summary and click Save. The message « Tenant added successfully » appears and the new tenant is shown with the New badge among the current tenants. The ID pictures are kept on the tenant's profile.Step 5: summary before saving.The tenant automatically gets the unit's rent and charges, and their instalments are created from the lease start date: you can then record their payments (see Record payments and track arrears).
Nous utilisons des cookies de mesure d'audience et d'assistance (Google Analytics, Highlight) qui ne sont pas nécessaires au fonctionnement du service. Vous pouvez les accepter ou les refuser.